Watercolor 101: Tips and Techniques.

goddess watercolor painting
“The Goddess,” a watercolor painting I finished a while ago.

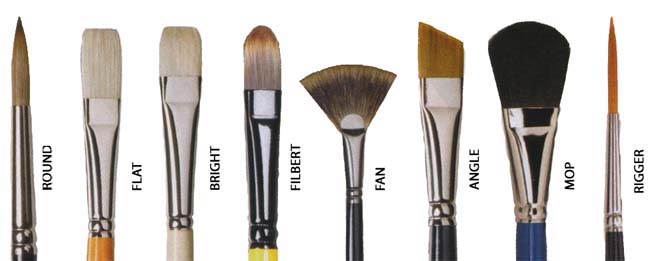
So yesterday I covered Watercolor tools and What those tools are for. If you haven’t read that yet, read it first, then come back here.

Today, I’m going to talk about how you use those tools, and share some tips I’ve picked up over the years.

The first trick to watercolor painting is deceptively simple:

Have a sketch ready.

It helps to have a foundation for your watercolor work, so sketch your subject first in pencil. NOT INKS. Many inks will smear when they come in contact with water.

The second trick is for mixing colors. Depending on whether you use cakes, tubes, or pencils, your blending techniques will vary.

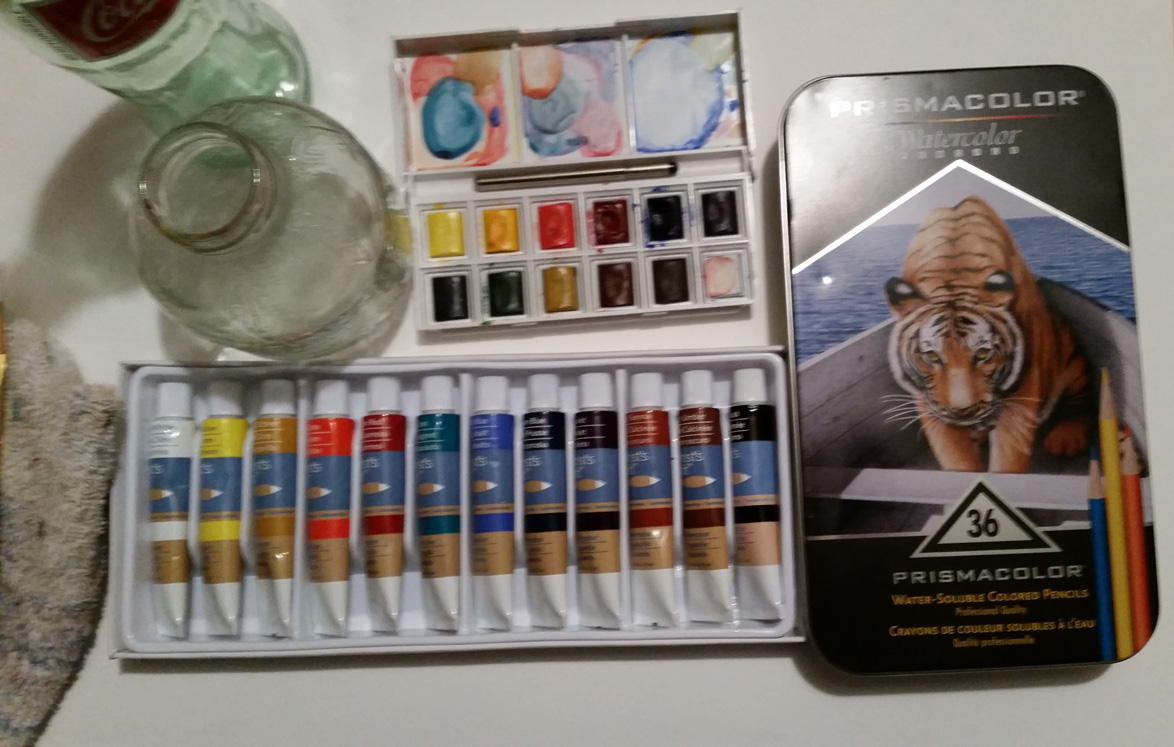
With cakes, have scrap paper handy to mix on the side. That way you don’t mix on the cakes themselves.

To mix tube colors, the best surface to use is either a palette or palette paper. This will help the tube paint last longer while you work, as well, since tube paints can dry out quickly. Also, use only tiny amounts of tube paint. The pigments are strong but they dry out quickly unless you add water frequently.

With watercolor pencils, try different types of hatching and cross hatching techniques from drawing. This will give your paintings an interesting texture and provides an easy way to layer colors.

The third trick for watercolor is diluting your colors to either a) make them more transparent, or b) make them easier to blend.

Do you remember in my post “Watercolor 101: Tools,” how I said you need two containers of water? One is used to rinse out your brushes. You use the second container to dilute your colors.

So load up your brush with color, then if you need to dilute it, dip it in that second container.

The fourth trick is actually going to be a bunch of tricks. These tricks will help you get different effects in your painting.

Use these following tools to get these effects:

Sponges, which blot or absorb color. This makes painting trees, clouds, and porous surfaces easier.

Salt, to absorb the color and create rocky surfaces.

Toothbrushes, to flick color on the surface. You load up the toothbrush with color, then you brush the bristles with your thumb close to the surface. This is an easy way to make stars and sand and other grainy textures.

Rubbing alcohol, to lift up the color in splotches.

Try out other tools and see what kinds of textures you get from them!

Those are just some basics techniques to get you started.

But I understand you may have some more questions, like…

“Does it matter what brand of paint I use?”

It’s entirely up to you what brand you use. There are tons out there, and there are even some brands that make student-grade paints. Student-grade paints have lighter pigment and are cheaper than brands like Windsor & Newton. They’re good, affordable alternatives.

“I heard about Masking Fluid. What is it and how do you use it?”

Masking Fluid is a special fluid you paint onto a painting surface so color won’t paint onto it. It acts as a mask (get it?).

The way you use it is you lay down the masking fluid on the areas you don’t want paint to touch. Then you paint like normal, amd when you’re done, you just rub it off.

Have more questions? Be sure to look at this handy reference from Wet Canvas. If you still have questions, leave a comment below and I will answer to the best of my ability.

Thank you for reading! And I will see you tomorrow.

Watercolor 101: Tools

I’ve been drawing with watercolors for about 8 years now. I’m not a professional (at least, I wouldn’t consider myself such), but I’ve picked up a few tricks.

This is good because when I look online for the basics of how to get into watercolor drawing and painting, I’m frustrated with how hard it is to read the information.

It’s a shame because watercolors are one of the most fun mediums you can experiment with.

Do you have to draw landscapes? No, not unless you want to. You can draw whatever you want with watercolors.

(There are even some watercolorists who design awesome tattoos, but that’s a different topic for a different day.)

But where do you start?

Well, first, I want to talk about the tools.

We’ll talk about how to use them, and what to draw with them, in the next post.

So what do you need to start painting and drawing with watercolors?

watercolor painting tools
A sample of the tools you’ll need.

First, you need two containers for water. The first one will rinse your brushes. The second one will be what you use to dilute colors.

Second. Brushes. This is really up to personal preference. However, keep in mind that in art stores there are brushes specifically made for painting with watercolors. These are going to be your best choices.

These brushes come in either of two types of hairs: synthetic, and natural. Again, your personal preference. My personal preference is for those made with natural hairs, because they retain water for longer.

Brushes also come with a variety of tips on them. Each tip is used for a different techniques.

Here’s a handy chart.

brush tip chart

Third, a rag.

Or a paper towel, or wash cloth. Or a dirty shirt. Anyway, You need something to wipe your brushes on between colors.

Fourth, the paints.

The paints come in three forms – cakes, tubes, and watercolor pencils.

watercolor cakes tubes and pencils tools
Watercolor cakes, tubes, and pencils.

These have their own pros and cons.

Cakes are easy to carry, are perfectly portable, and come in a set. However, the color range can be limited, they’re tricky to mix, and the colors are more transparent (meaning you can see the paper underneath).

Tubes come in a large variety of colors and are easier to mix than cakes. They are also very opaque, meaning you can hardly see the paper underneath. However, they take up space and you need either a palette or palette paper (which is waxy) to mix them.

Watercolor pencils are unique. They work like colored pencils, and you can color with them like such. Then you add water in strokes and voila! You have a watercolor piece.

Watercolor pencils are easy tools to work with, and it’s easier to get gradients (which are swaths of color moving from dark and opaque on one side, to thin and transparent on the other) with these tools.

The drawback to these tools are that, like cakes, color selections are somewhat limited, though some sets have a nice range of colors. The other drawback to this tool is that they leave behind a texture, which can be a problem if you want a smooth color.

Back to supplies. You will need…

Fifth, a painting surface.

The best surfaces to paint watercolors on are papers. The best of the best are mixed media papers (which are nice and thick), Bristol paper (which is often smooth), and watercolor papers (which are thick and toothed. Toothed paper means it has ridges, which helps retain water).

Sixth, a color wheel.

This is a necessary tool for any artist. It shows the primary, secondary, and tertiary colors on the color wheel, as well as their compliments, analogs, tints, and shades.

color wheel
Color Wheel

If you don’t know what I’m talking about, be sure to check out this primer on color. There’s also this page that goes more into color theory.

And seventh, scrap paper.

Preferably, this scrap paper will be the same type of paper you’re painting on. With this, you can test and mix your colors before committing them to your final painting. This is also the best surface for mixing cakes. I’ll talk more about how to do that later.

Those are the tools you need to get started with watercolors. I’ll talk about techniques, tips and tricks in the next post.

Thanks for reading, and I’ll see you tomorrow.