This post is the first in a week-long blog post update extravaganza! (It’s when I update my blog everyday, Monday through Friday, just for this week).
I just finished a new illustration in colored pencil! So to celebrate, I wanted to show the progression of how I made it and the tools I used. And at the end of the blog post, you can see the finished piece.
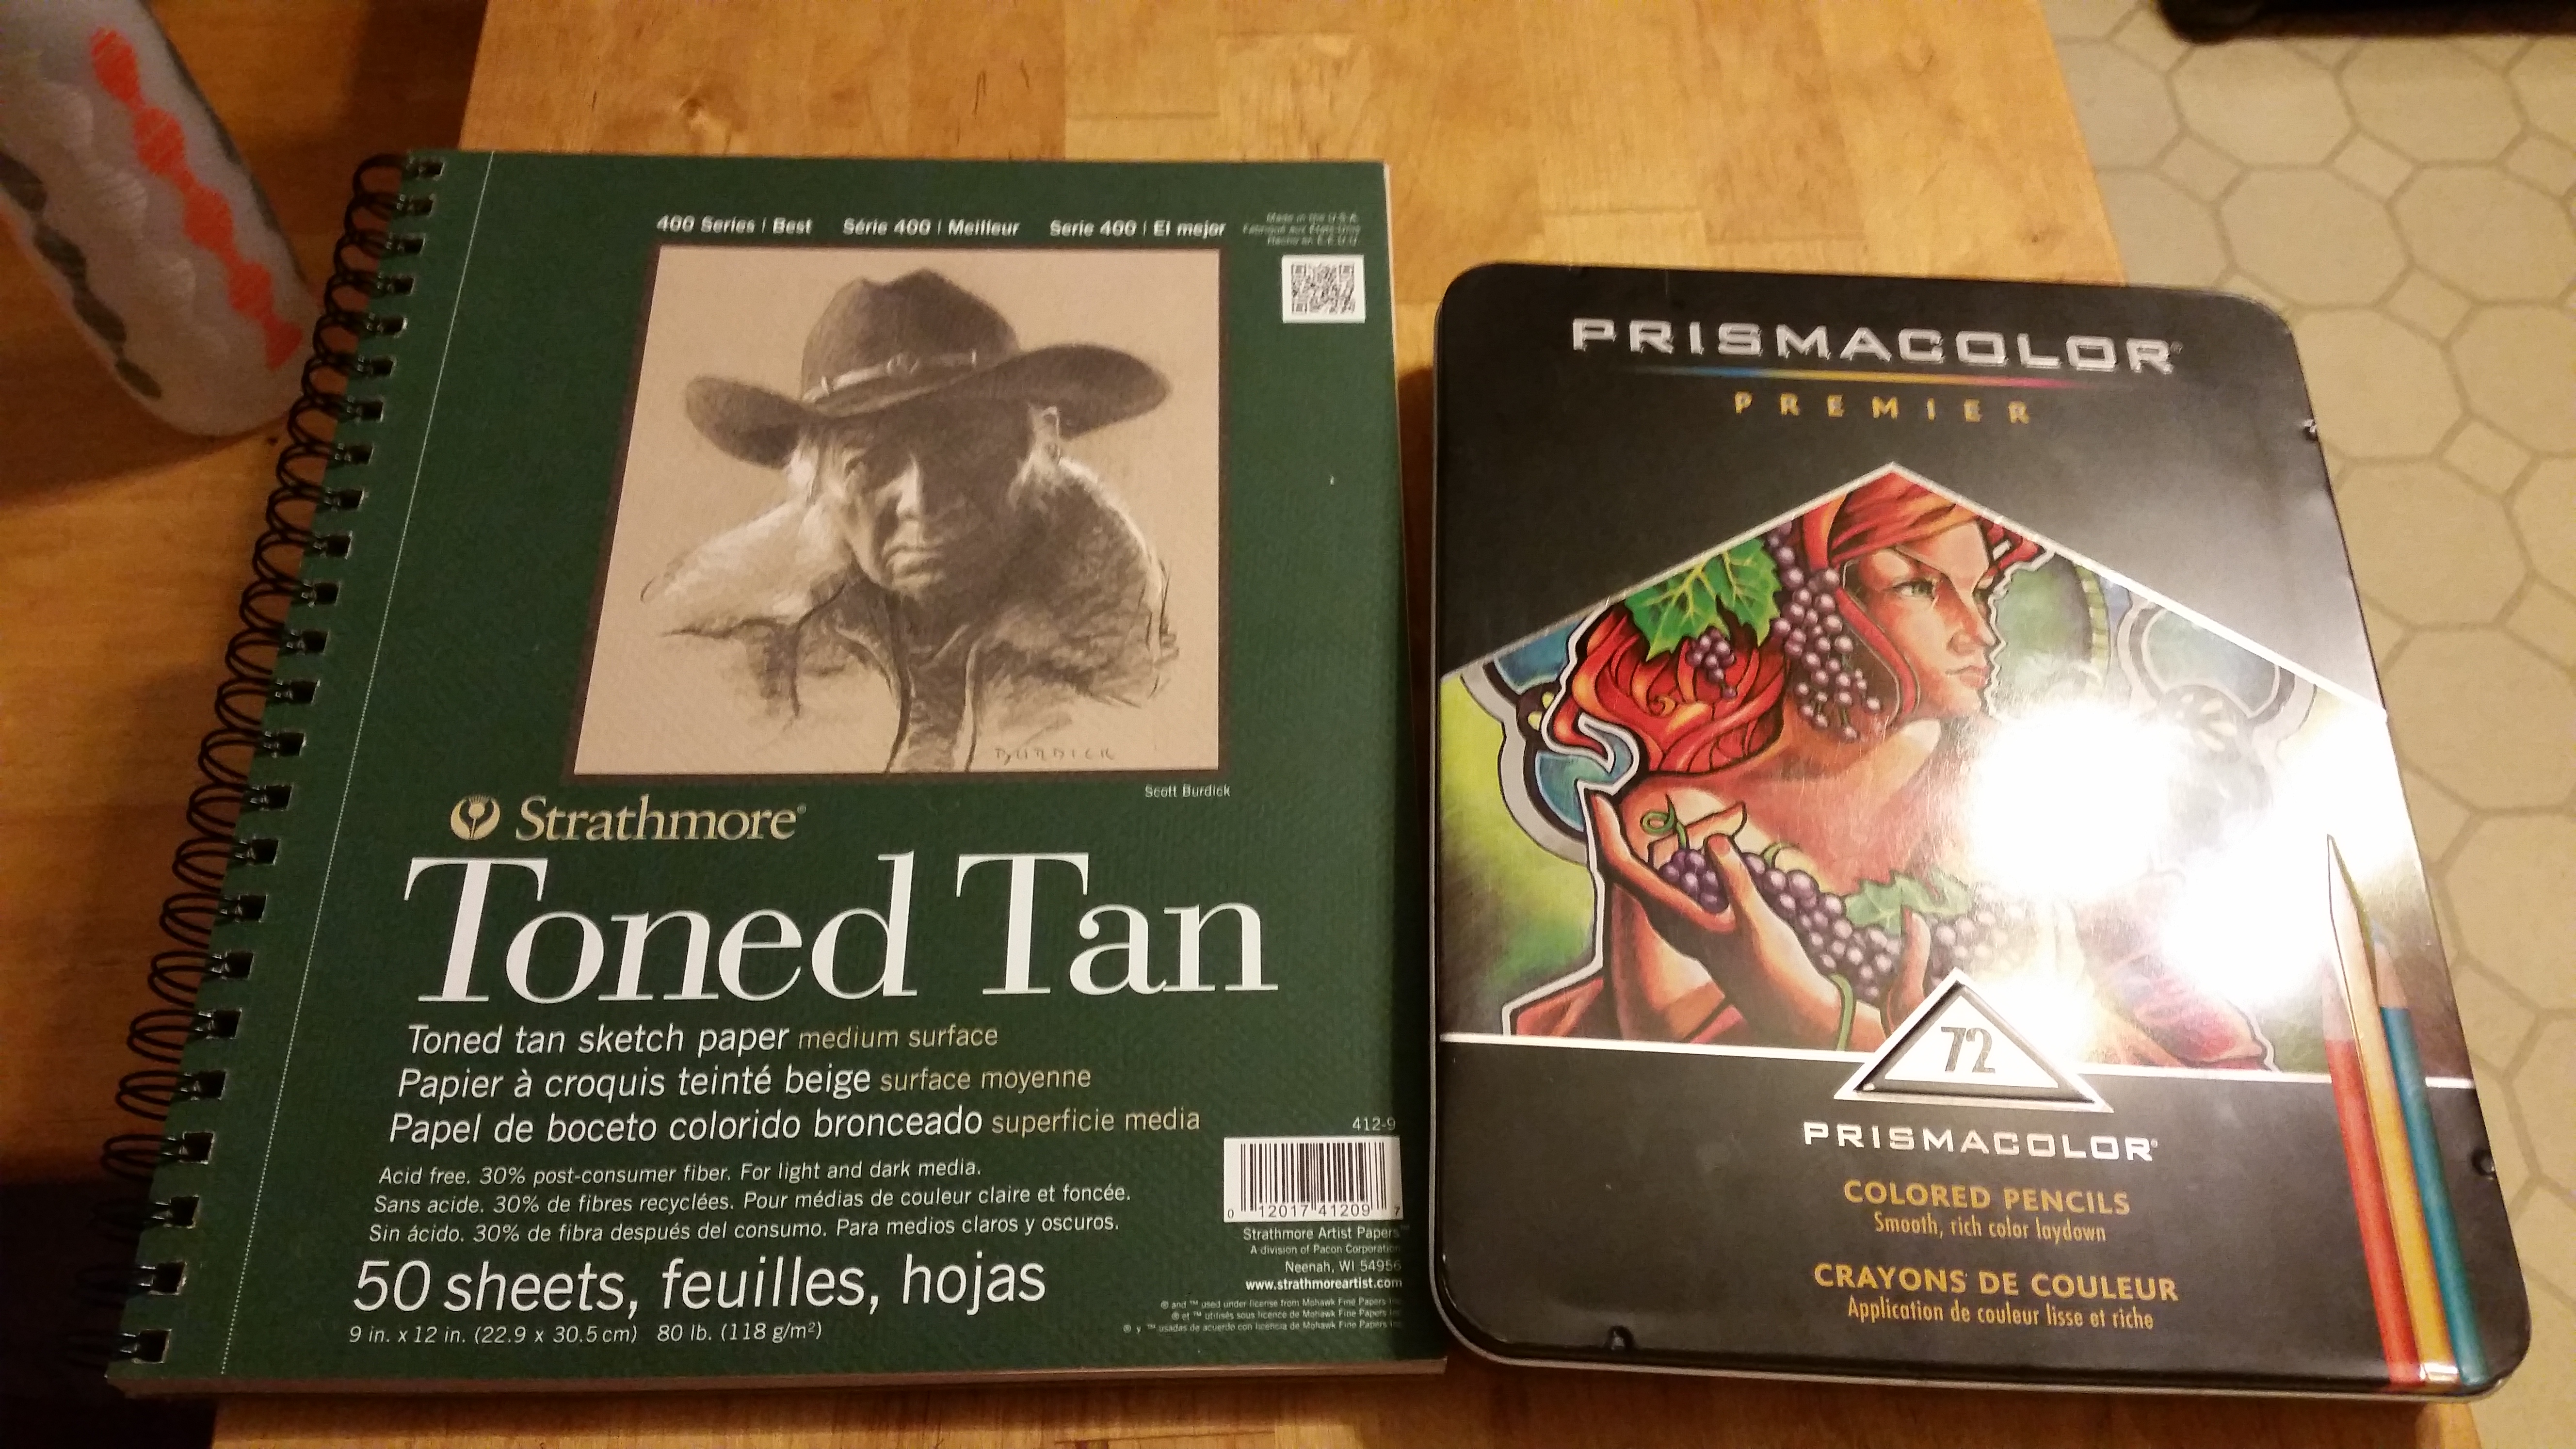
To start, I grabbed my Prismacolor 72 piece colored pencil set (which I had left over from my first ever art class in college. Hold on to your supplies, students!) and an 9 wide inch by 12 inch pad of Strathmore Toned Tan paper.
Once I got those, I drew the black and white version of what I wanted to color. I sketched in (lightly) where the shadows would lie with my trusty F hardness sketch pencil. I use that pencil for all of my drawing and sketching.
Then I go over those lines with my mechanical pencil, which I believe is a B hardness in lead, so it’s darker than the F.
Next, I color over the whole sketch with a white colored pencil. I do this so that…
- I don’t lose my shadows
- I have a layer of colored pencil between my pencil lines and my actual colors, thus
- making my art much cleaner and less muddy.
Once the white is laid down, I lay down the brightest colors I’m going to use, and color from light to dark.
The first layer of colors end up looking a little like this:
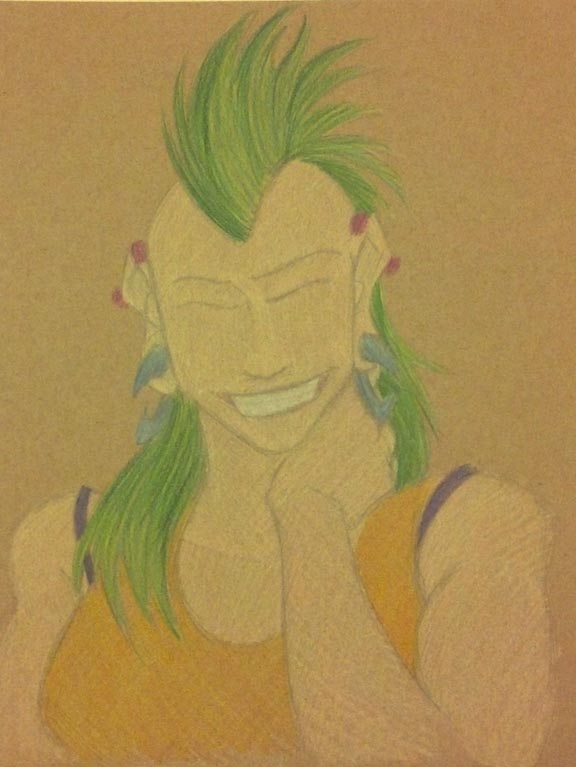
It’s not the prettiest…yet.
Also, I did not use light peach straightaway for the skin tone. I laid down the highlight color, which is a mix of Cream and Beige.
Alright, so I drew the light colors first. What next?
The shadows!
I really wanted to try and find colors that would compliment Roxie’s hair, which is why I went with fuchsia industrial piercings, dark blue gauges, a purple camisole, and an orange-yellow tank top.
Also, use the color wheel. It is your friend.
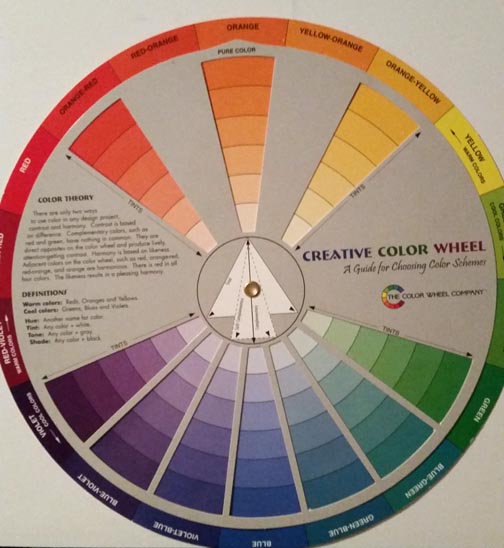
I used this to help me find the complimentary colors mentioned above, and it also helped me find what colors to use for shading.
So at this point, I have colored the highlights and the shades. There’s just one layer missing…
Oh I know! The mid tones!
I took the colors I wanted for the mid tones in each area, which went a little like this:
- Mohawk: Spring Green
- Shirt: Canary Yellow
- Gauges: Cloud Blue
- Camisole: Violet
- Piercings: Magenta
- Skin: Light Peach
- Teeth: Cool Grey 20%
But after I colored the mid tones and finished out a few minor details (like the teeth), I noticed that the shade tones got lifted up a little.
So I went back over the mid tone layer with the shades again. Which went like this:
- Mohawk: Dark Green
- Shirt: Dark Brown
- Gauges: Ultramarine
- Camisole: layers of Violet Blue, Ultramarine, and Indigo Blue
- Piercings: Mulberry
- Skin: Sienna Brown
- Teeth: French Grey 60%
Then I added some neutral tones like brown in the linings of the mouth.
The last step was VERY LIGHTLY adding Black on the edges to help delineate shadow.
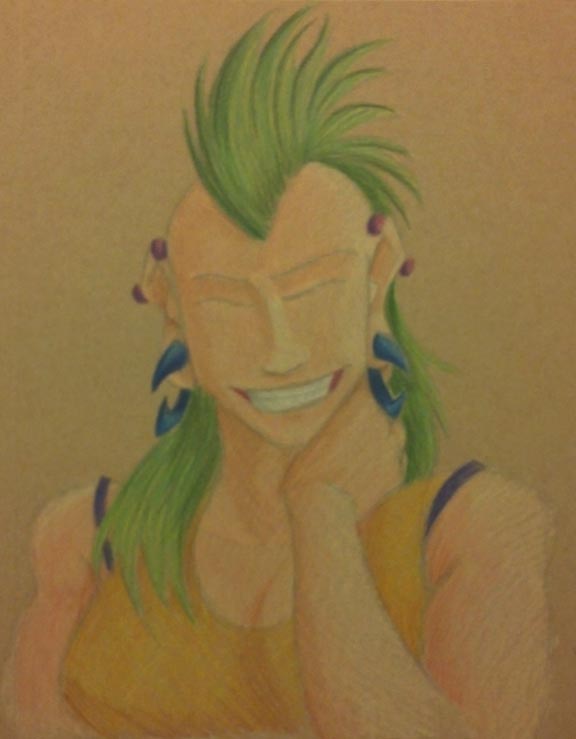
Finally, at long last…
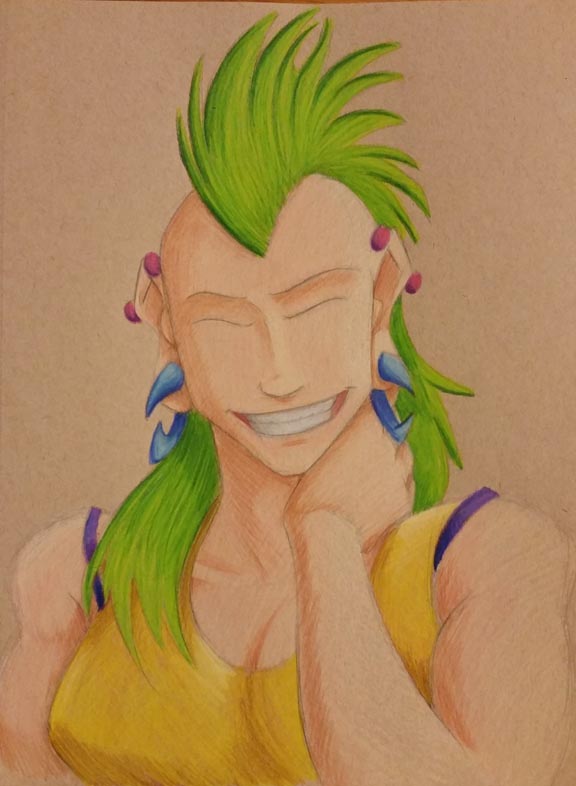
This portrait is finished!
Looking at it, there are still some errors that I notice (like her nose), but I have to say…
This is the first colored pencil piece of art I have made in a little over five years. I think I did alright. It’s not the best, but it’s not the worst. With practice, I’ll get better.
So what do you think? Should I do more portraits in colored pencil? Let me know your thoughts in the comments below!
In other news, the KickStarter for Seeing Him is wrapping up, and, to be honest, I don’t think we’ll make the goal.
But that’s ok! Kia and I have been talking behind-the-scenes and we have a few ideas for what to do next. I’ll be able to share them with you soon.
Thank you for reading, and I’ll see you back here on the blog tomorrow. Or in comments at Validation. Or Johnson & Sir. Or Charlie & Clow. Or Tumblr… I’M EVERYWHERE.