Ko-Fi and Patreon: How Am I Using BOTH?

tiny painting of princess rosetta with art tools framing the photo

As far as platforms go, Ko-Fi and Patreon have similar goals: make it easy for fans to support creatives. I get the impression that some folks use one but not the other. I DARE to use both. So how do I do it?

Well, let’s cover the similarities and differences first:

Ko-Fi (I think it’s pronounced ‘coffee,’ and you’ll see why) is a platform that lets you donate the price equivalent of a cup of coffee (get it?) to your favorite creative person. By giving, you support the creative, AND you get access to some supporter-exclusive posts.

Patreon lets fans subscribe to their favorite creatives by pledging a specific amount of money, to give either each month, or for each project. You get rewards in exchange for how much you give. The more you give, the more rewards you get.

Ko-Fi also has an option to let folks subscribe to their favorite creatives with a monthly donation, but this option is only available if the creative pays for a Ko-Fi Gold plan. Otherwise, it’s just one-time donations.

Patreon grandfathered me into a particular package deal, because I had been on the platform for so long.

As of this writing, Patreon has 3 plans, depending on how big your team is. If it’s just you, you get a simple button and you don’t break down your rewards like tiers (like KickStarter does). If you’re a handful of people, but not a huge team, you can get on the Founder Level, which is what I have. This allows patrons to select their level of patronage from the options you provide just like you would with KickStarter. Patreon also has a level above Founder, but that’s intended for creative teams that are 10+ people, or folks who run a business with subscription boxes that ship.

In the indie comics verse, I’ve seen some folks use one platform, but not the other. More often, I see both. I decided to be kooky and use both platforms, as well.

So how am I using them?

Admittedly, I sought out using Ko-Fi to fund a side project. Then the side-project fell through. So then I thought, “Maybe I’ll offer this as an alternative to Patreon! I’ve seen some people’s eyes roll at the mention of Patreon. Maybe they just need an option that’s different.”

But after having received a few donations through Ko-Fi, and after having been on Patreon for many years, I’ve discovered this in my experience:

The support I get from Patreon is for my art. The gifts I’ve received from Ko-Fi come with notes thanking me for my blog.

So – I’ve decided that Patreon will fund my art…and Ko-Fi will fund my writing.

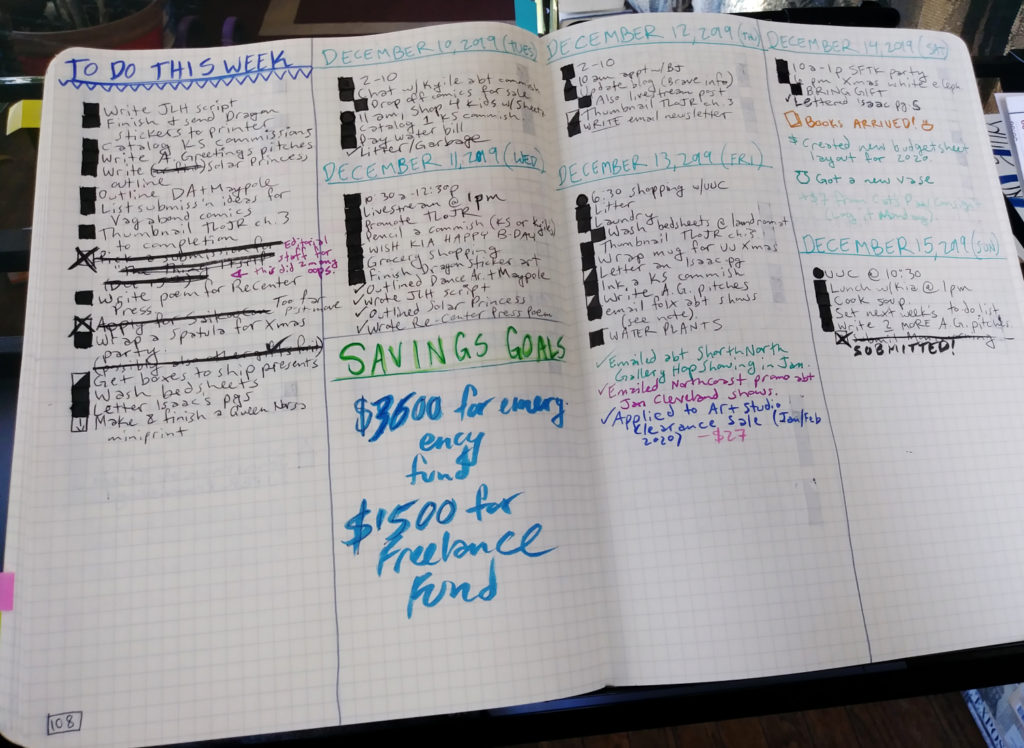
Yes, I DO write. I’ve done the National Novel Writing Month Challenge two years in a row, and I’m hoping that this year will be my third.

And obviously I write blog posts. And, curiously, I’ve had patrons on Patreon ask me to make poetry for them.

So that’s the plan moving forward!

If you would like to support the art-side, check out Patreon. Heads up – I will be revamping the reward tiers and promotional art soon.

If you would like to support the blog, check out the Ko-Fi. I have new rewards available that are writing-specific. You can give once OR give monthly (I opted for the Ko-Fi Gold).

That’s all for now. Thank you for reading!

You. Are. Awesome.

How Do I Stay So Productive? A Peek Into My Bullet Journal

I’m in charge of a LOT of shit. From working a part-time side hustle (that sometimes works me full-time hours), to making comics for myself AND clients, to commissions and livestreams, I have a lot going on at any given time. And that’s not counting my volunteer work or recreational time. So how do I stay so productive?

Let’s take a peek into my bullet journal.

kelci crawford comic artist's bullet journal spread

I started keeping a full-on planner back in 2017. But the planner wasn’t as customizable as I wanted it to be. So for 2018 I got a Moleskin graph paper notebook and started keeping my planner that way.

I didn’t realize that what I was doing was, essentially, keeping a bullet journal…until I saw bullet journals on YouTube and Pinterest.

So I studied some layouts other people were making, sketched out some of my own, and put some of those layouts to use for 2019 in my new bullet journal.

Now, I opted for a BIG journal this year, because I wanted to see my full week in one two-page spread. I gauge my work by what I get done in a given week. This is because:

  • one week is more manageable at a glance than one month.
  • I tend to overestimate what I can do in one day but underestimate what can be done in a week. So I hacked that tendency and started going by the week rather than the day.
  • I have some side hustles that pay me by the week. So I structured a lot of things around those paydays.

Admittedly, it took a while to get to how I wanted to handle my week. But now I have a system that works.

Here’s what I do:

I make one column of all the objectives I want to accomplish in that week. (My week runs from Monday to Sunday. I keep Sunday as a rest day/day off AS MUCH AS POSSIBLE).

The remaining columns are dedicated to making my to-do lists for the days of the week. I used to use a grid system, but I like the columns better. Columns can keep things condensed, while also allowing for some days to be more productive than others.

I primarily use my bullet journal to track my to-do lists. My calendar and notebook are all digital. (But I DO need a new physical address book. My current one is too tiny for all the contacts I have.)

I DO NOT keep a calendar in my bullet journal. Some people do. I cannot. I use Google Calendar rather than using a bullet journal calendar and a digital one. When I had 2 calendars, I would accidentally double-book myself for work. And given how my schedule can change at the drop of a hat, a digital calendar is more customizable than a physical one.

That’s all for today!

Would you like to see more of my bullet journal? Want to talk about yours? Let me know in the comments. I love talking about productivity.

Thank you for reading!

You. Are. Awesome.

How I Made the RathaCon Limited Edition Print Art

This post does contain affiliate links. Bear with me.

So this started, initially, as a multi-part blog post series.

Then it got complicated.

Specifically, the art got complicated, and I wasn’t able to make a new blog post each week to detail the process of making this thing.

Let’s go into the details, though, so I can show you WHY this art took so long. And also how I make big illustrations like this one.

STEP 1: THUMBNAILS

Thumbnails are what I like to call the really rough sketches of an idea. It’s something I borrowed from animation film language.

I already wrote a post about this step, which you can read here.

STEP 2: PENCILS

I wrote about why I choose this design, as well as the details of it, in the second part of the blog series. Now I’m going to get into the how.

It took a little while for the email chain with the convention staff to start (another reason that the weekly blog post idea had to get pushed). But once it got going, I was able to get feedback and get to work.

Pencils – or, the sketched the version of a thing – is something I do with just one pencil in one go.

When I first started in comics, I USED to do the undersketch with one pencil (usually a 2H), then the top layer in a darker tone (like B).

Now, I do all of my pencilling with just one pencil. Usually a mechanical one. I believe the RathaCon art was drawn with my Tombow monograph mechanical pencil, but right now I am in LOVE with the Zebra DelGuard mechanical pencil.

STEP 3: INKS

This step takes a deceptively long time.

It takes a long time for me because I try to control the line weight as much as possible: making some areas dark with a bolder line, but light with a lighter line.

Inking is also the stage where I have to squint at my pencil drawing and determine what lines will look the best when inked.

Because pencils are when I get real loose. Inks are where things get tight and snappy.

STEP 4: COLORS

Depending on the piece, I’ll make it either traditional-only (usually with Copic markers). Or I make it a combination of traditional and digital. Or I have all the colors be digital.

For the RathaCon print art, I opted to combine the traditional and digital modes. So I colored with my Copics first, then scanned the art, to start the next step…

STEP 6: DIGITAL EDITS

At this stage I go back over the art in Clip Studio Paint and erase any stray marks, fix any color bleeds, and generally just clean the piece up.

I also like to adjust how much the colors pop at this stage. So I play with the levels a little.

STEP 7: DIGITAL COLORS

With the RathaCon art, the only digital color I needed to add was the background tint.

In almost any other piece, I’ll add a layer over the art in Clip Studio Paint in order to add shadows. These make the art pop even more.

STEP 8: FORMATTING

I originally made the art for this print at 11 x 17 inches.

About a week ago, the RathaCon staff asked if I could make the piece an 8.5 x 11 inch one instead.

Pro tip: it’s WAY EASIER to shrink an illustration than to enlarge it.

It took a little wiggling to keep the scale of the piece consistent and not accidentally cut off bits of it. But a new scale was figured out.

And there you have it!

As I mentioned, this art will be available as a limited edition 8.5 x 11 inch print at RathaCon, for $10 a piece.

So if you’re in Athens, OH on April 27, I hope you get it! This is a limited print run, so once it’s gone – it’s gone.

I’ll have these beauties for sale at my table, and they’ll also be available at the RathaCon official table.

Thank you for reading!

You. Are. Awesome.

The Silly Tale of the Smith Family Commission

I was first approached by Mr. Smith, at the Pittsburgh Witches Ball. He asked me if I was available to do commissions.

That made me ask, “What would you like me to draw for you?” And he said, “I was thinking of getting my family drawn as superheroes. But let me get back to you on that.”

About a month later I was approached by Mrs. Smith.

She asked, “Can you please draw my family and me as super heroes?” To which I said, “Absolutely!”

That resulted in this:

While I was drawing this, Mr. Smith contacted me again. He said, “Hey! Are you still available to do commissions? Because I would really like you to draw my family as superheroes.”

Before I could reply, I contacted Mrs. Smith and said, “Uh…your husband just asked me to make the same thing you asked for. What should I do?”

She laughed.

So I said to Mr. Smith, “Sure I can make the thing!”

And that’s how I drew this:

They were both surprised when the presents were unwrapped.

Big Changes Are A-Coming

Holy banana pants, I have so many announcements! So let’s break it up into parts.

SLEEP-OUT

This Friday I will be with Mel, co-founder of our local LGBT advocacy group, Beyond the Rainbow, to participate in the Wheeling Sleep-Out.

The Wheeling Sleep-Out is a charity event where groups of people compete to build the best cardboard fort, and then they must spend the night in the cardboard forts. The event is to raise money for Youth Services Systems, a Wheeling, WV-based non-profit working to end homelessness in the community.

Here’s where you can donate! Be sure to use this link, because teams who raise the most money get recognition.

PITTSBURGH WITCHES BALL

Literally the day after the Wheeling Sleep-Out, I’ll be at the Pittsburgh Witches Ball to sell my wares. Find the ball at the American Serbian Club.

Unlike most events, the Witches Ball runs from 5 pm until 10 pm. I hope you can make it – I won’t hold it against you if you’re only there for a short time.

Also, one of my pieces will be available at auction. Wink wink.

ONLINE STORE

Storenvy, the platform I used for my online shop, is going to get re-purposed. Because I’m moving all my comics, prints, and other convention products to my own little store!

The new store is still a work in progress, but you can find it at shop.kelcidcrawford.com. Some of my patrons from Patreon have tested it and it’s working well.

So the comics and art are moving to shop.kelcidcrawford.com, which means Storenvy is getting retooled – it will now be home to handmade crafts and one-off products, like the paper bead bracelets, handmade journals, and (coming soon) watercolor greeting cards.

KICKSTARTER

Now that the Validation’s Final Push campaign has wrapped up, it’s time for a new campaign.

This time, we’re looking to get Gods & Spirits: A Sketchbook to print! This book collects all the sketches done during Inktober this year, PLUS includes new illustrations and never-before-seen sketches.

Expect it to launch this coming Monday, November 5 – email newsletter peeps and patrons on Patreon will be the first ones to hear the news. So sign up for one or the other to jump on those early-bird tiers (because there will be at least one early-bird reward level) (Also Patreon peeps get bonus goodies).

COMMISSIONS

Well, I’m now making comics full-time – I WAS working at my local comic shop. NOT ANYMORE. (Long story.)

So now I have time to make commissions. These will make great gifts for the holidays (hint hint, wink wink). Rates start at $20 for a black-and-white character sketch, and varies from there.

Here’s a link to the full listing.

BLOG POSTS

Expect Review Day Tuesdays and Featured Artist Fridays to come back soon…

THAT’S IT.

Thank you for reading!

You. Are. Awesome.