In this archived live stream, I show you some Clip Studio Paint tips and tricks!
Clip Studio Paint is my preferred drawing program. I’ve been using this for years, yet it feels like I learn something new every day. And here, I wanted to share with you some Clip Studio Paint tips and tricks I’ve recently learned!
I streamed this back on May 29 on YouTube. Now it can be archived here for your reference.
Here are some timestamps for easy reference:
BASICS:
3:00 for opening and setting up a new document. (Includes how to change canvas color)
4:00 recording timelapses
4:45 hand-lettered effects
7:00 coloring entire layers
8:17 how to change colors of specific elements in a layer using “lock transparent pixels”
INTERMEDIATE:
10:30 a nifty trick erasing bordered lines
13:00 add outlines to objects already drawn
13:45 add shoelaces and other costume details
25:03 my old method of adding symmetry
26:00 make rulers visible
27:20 add guidelines
28:20 group layers together
31:20 how to make custom brushes
Did I forget something in the live stream? Leave a comment below and let me know!
Do you have questions? Let me know, too. I plan on doing another live stream like this one, showing even more tips and tricks.
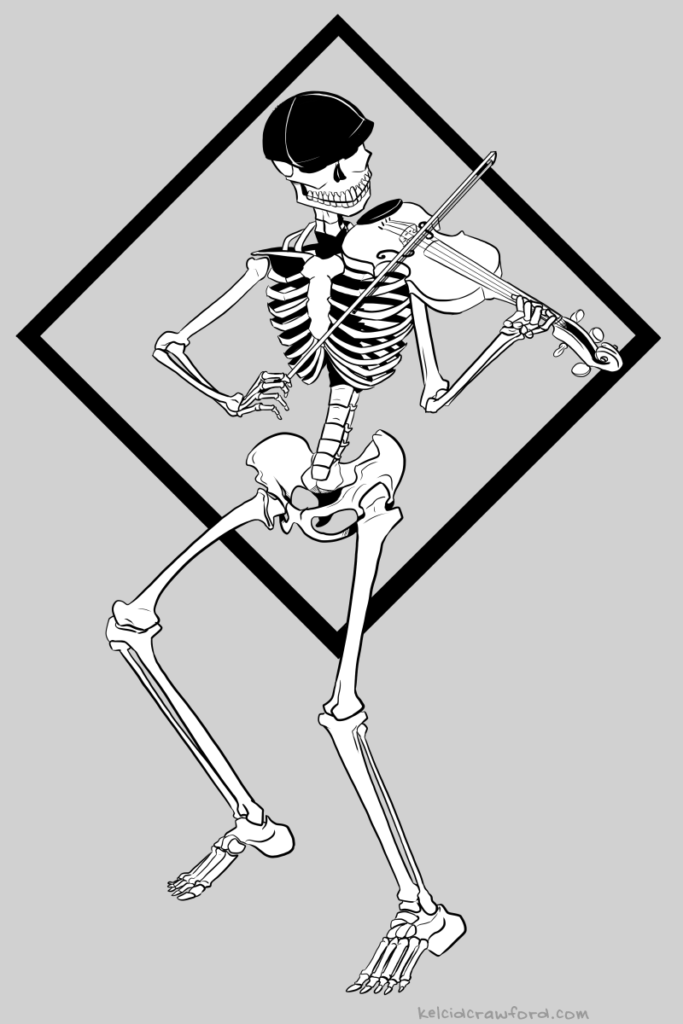
I drew this skeleton fiddler as a commission for someone last month. I think he turned out well!
I drew this entirely digitally, on Clip Studio Paint. It’s my program of choice, because PhotoShop is a hard drive hog and CSP is much smoother and easier to manage.
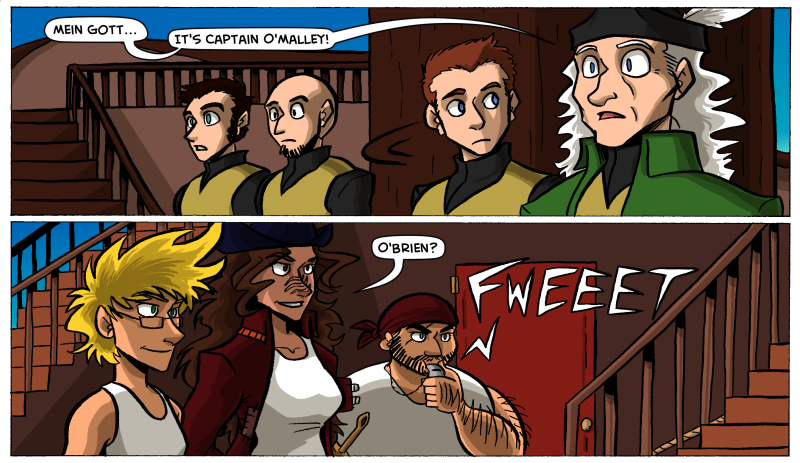
Here’s part of page 9 of my webcomic The Legend of Jamie Roberts.
Ever since I switched from PhotoShop to Clip Studio Paint, I have LOVED how much easier Clip Studio Paint is to use.
That said, on occasion it can be a bit of a headache. One specific way it can bother me is when I’m adding shading to a comic page.
See, I cheat a lot – I’ll trace a shape over where I want my shadows to be, and then I use my Bucket tool to fill in the blanks. When I do this I often have the bucket tool set to “Refer to other layers.”
Why? Because my line work is on a separate layer from my shades. I don’t do all of my art on the same layer, you fiend.
That said, sometimes CSP will have a brain-fart, especially if the shade color is very close to a color I’m painting over. So instead of only filling in where I want, sometimes CSP will be like, “color THE WHOLE THING? OK!”
But I figured out a way around this. And it’s made producing comics WAY easier.
The secret?
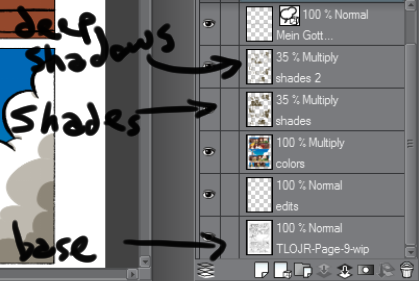
Well, I need to show how I do a comic page first.
I have the following layers to work with: the base drawing. The Edits (where I clean up lines and smudges). Colors. Shades. Letters.
The secret is: I turn the Color Layer off.
It’s super easy: just click the little eyeball on that layer and boom – it turns off.
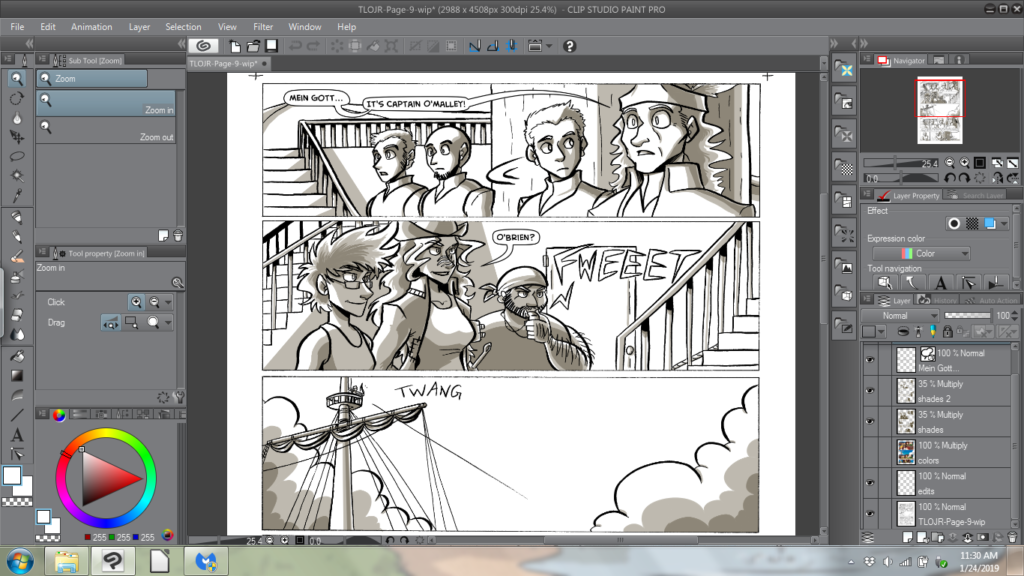
This has made shading A LOT easier. My Bucket tool no longer tries to fill in a space that’s the same/similar color to the shade color.
Also – it has made looking at what I’m shading WAY easier.
I tend to include a lot of dark colors in my pages. That makes shading a thing pretty tricky to the naked eye. So turning the Color layer off has made it far easier to judge how far shadows need to go.
Another plus is if I wanted to make a black and white version of a color comic, this cheat makes it easy.
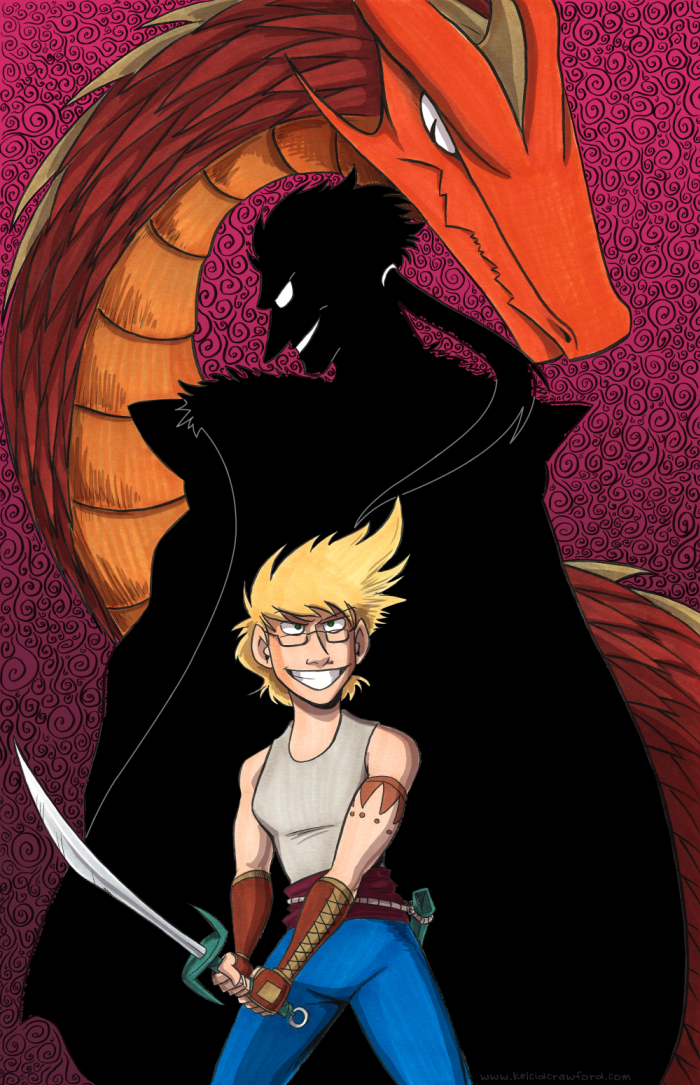
Awwww yeah! This print got finished not too long ago to showcase my new upcoming webcomic, The Legend of Jamie Roberts. (Coming online mid- to late-November.)
Illustrated here, from foreground to background, is Jamie Roberts, Ragun Ranki (pronounced Rah-Goon Ra-N-key), and the dragon shape of Ragun Basho (pronounced Rah-Goon Bah-show).
This took a little while to illustrate, especially with the waves of The Way in the background. The Way is the spirit world, where souls rest after death and before birth, and where Ranki was banished after The War of the Leaders 500 years before the start of the Legend.
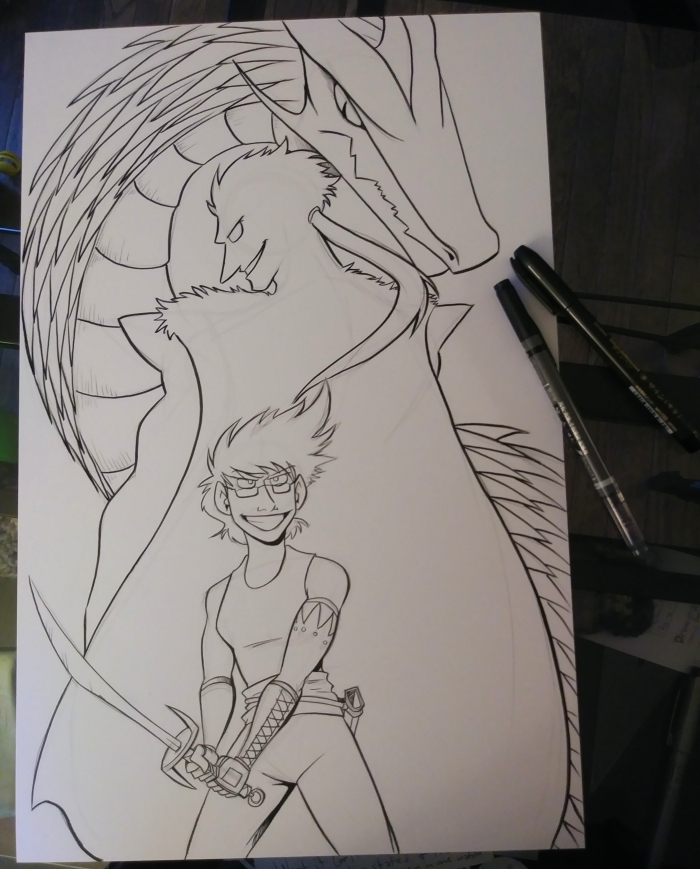
Here’s some clips of the progress of the piece:
The colors of the background and Ranki were done in Clip Studio Paint to save me some marker ink.
This image will do double-duty as both a print and as the cover art for Chapter 1’s online serialization.