Last time I spoke about How I Make Johnson & Sir. Today I want to show how I make a comic strip for Validation, the other webcomic I work on, because the process is a little different.
If you ever get lost in the technical bits (especially in the Photoshop section), I explain some of those steps in How I Make Johnson & Sir so hopefully the techno-lingo won’t be so confusing.
Today, I’ll show how I made strip #105.
Step 1: Get the Script
I don’t (really) write Validation. Christian does (though we often talk story ideas over). I wait for her to send the script over to me first, and then…
Step 2: Layouts
Sometimes I skip this step, depending on how simple or complex the strips are in the script. Since I work in three panels, it’s important to know where characters will be placed and where speech balloons will go, to make the strip as readable as possible. That way it won’t be so cluttered.
I did not do layouts for strip #105 because it was scripted in a pretty straightforward way, and I had an idea for how I wanted the strip to look.
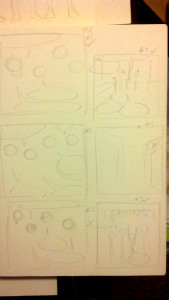
However, I’ll show the layouts I did for #103, which had some weird camera angles.
Step 3: Ready the Paper
I tend to do this step ahead of time. Thankfully I can get two strips from a single sheet of 9 inch by 12 inch Strathmore Bristol Vellum, which is my paper of choice for Validation. I trim the paper (to make it easier to fit on my scanner) and I’m good to go.
Step 4: Pencil the Strip
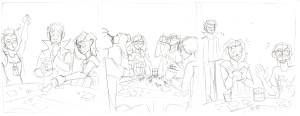
Pretty straightforward. Although, if you notice two extra characters, one looks like me and one looks like my boyfriend. Fun fact!
When that’s done, I send the pencils to Christian (via DropBox) for approval. This is where any changes that need made can be done, though 99.9% of the time she gives the ok.
Step 5: Ink
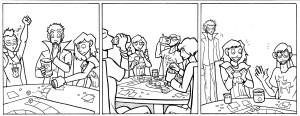
Once I get the ok, I ink!
To add a little depth, especially in panel 2, I made the foreground figures in thicker lines to make them pop more. I used a micron pen with a 1.0 width. The background figure in Panel 3 was drawn mostly with 0.5 and 0.3 width pens, with finer details in a 0.1 width micron pen.
Step 6: Color with Markers
My markers of choice are (from most preferred to least)…
- Copic markers
- Prismacolor markers
- Sharpies
I used to do the entire comic in marker, but now I only do half. Sometimes it’s because a marker died, the markers will not blend well for the background, or I need a color I don’t have a marker for. So I just color what I can.
Step 7: Scan and Tweak in Photoshop
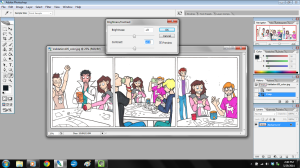
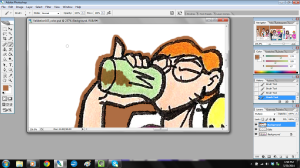
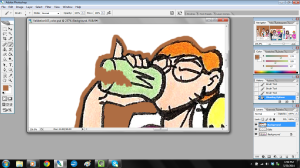
Once marker coloring is done, I scan the strip in at 300 dpi (dots per inch) and open it in Photoshop. The first thing I do is adjust the brightness and contrast (shown in the above picture). That way the strip isn’t so dim. Then I adjust the curves.
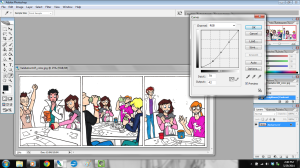
Doing this will let the colors really pop.
Once those adjustments are done, I make a new layer in Photoshop and call it “EDITS”. This is the layer where I correct color errors I made with the markers, fix any wonky lines, and clean up smudges and spots.
Step 8: Color the Background
Then I make another new layer on top of that and call it “BACKGROUND”, because here’s where I add background color.
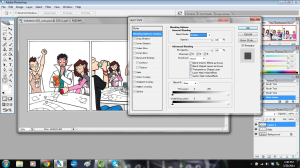
If you notice, I adjusted the blending options for this layer. For “EDITS” I left those settings alone, but with “BACKGROUND” I set it to Color Mode: “Multiply” at a Fill Opacity of 100%.
The reason I do this is because Multiply mode actually keeps the lines clean while still coloring. It works like this:
Rather than it looking flat and gross like this:
Then I just color in the background colors as needed.
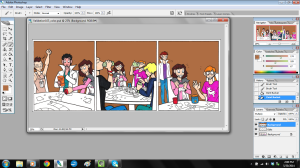
Step 9: Color the Rest.
Once backgrounds are done, I make yet another layer on top and call that “FLATS.” I also set this layer to Color Mode: Multiply and Fill Opacity at 100%. This is where I color in the things my markers missed, like Jim’s coat and the game table.
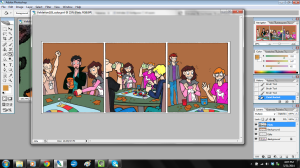
…Sometimes I have another file open to reference for color.
Step 10: Color the Shadows
This step is one I talked about a little bit in my previous tutorial, but here you’ll really see it in action.
I make a new layer on top, call it “SHADES,” and then set to Color Mode: Multiply and – here’s the surprise – Fill Opacity at 35%.
Notice it’s not at 100%? That’s because I don’t want the shadows to be overpowering. I also want the color of the shadows to blend, instead of getting any weird effects that would happen if I changed the paint brush opacity (yes, you can do that).
Once I do that, I color the shadows in, and it looks like this.
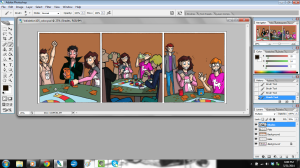
I did something a bit unusual in Panel 2: I put the two figures closest to the reader in shadow. I did this to frame the picture and keep the focus on Ally and Kyle.
So now the colors are done! I save the file, and then flatten the image so all the layers merge. Then I make another new layer and save the file for lettering.
Step 11: Write the dialogue
For this step, I have the open file of the script handy so I can refer to it.
Then I write the dialogue and captions.
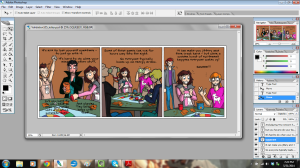
I try to arrange them in such a way that they won’t block too much of the art, and to ensure it can be read easily.
Then, once everything is written and checked for spelling, I get to the bottom layer, make a new layer, and start placing the balloons and boxes with the rectangle tool.
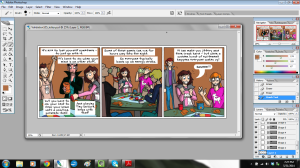
I use the rounded rectangle for dialogue and the plain rectangle for narration.
To make the tail for that balloon, I got to the bottom layer again, made a new layer, and painted it in.
Once all of that is done, I merge the layers to flatten it out, and then…
Step 12: Save the File!
I save it first at its current size and call the file “Validation105_large.”
Then I adjust the image size.
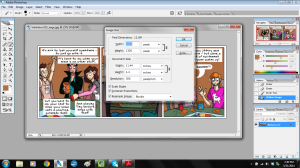
The large file is at 300 dpi, which is the right size for print, but it isn’t too web-friendly. So to make it nice and tidy for the website, I shrink it from 300 dpi to 100 dpi. And I save that file as “Validation105_small.”
I send the finished strips to Christian via DropBox, and shazam! I’m done!
I hope you enjoyed looking at my process, and I hope you found something useful from it!
I’ll see you again on Wednesday.
